Video credit: Howcast
Buying a used fish tank can be a fantastic bargain. You might find a perfectly good aquarium for a fraction of the price of a new one.
There is just one little problem.
It may look like somebody previously hosted an algae convention inside it.
Hard-water stains, dried algae, dusty gravel, cloudy decorations and a filter that looks like it has seen things can make a second-hand aquarium pretty intimidating. The good news? Learning how to clean a used fish tank is easier than it looks, as long as you use the right method.
There is also an important difference between cleaning an established aquarium and preparing a previously owned tank for a new setup. A used tank that is empty can be cleaned much more thoroughly. A running aquarium with fish should be maintained gently so you do not destroy the beneficial bacteria that help process waste.
That distinction matters because some advice from older aquarium articles is now outdated. Routine cleaning does not mean stripping everything down, replacing all filter media, or scrubbing the tank until it looks sterile. Modern aquarium-care guidance emphasizes partial water changes, careful substrate cleaning, gentle filter maintenance and protecting beneficial bacteria. PetMD’s 2026 fish-tank cleaning guide makes the same point.
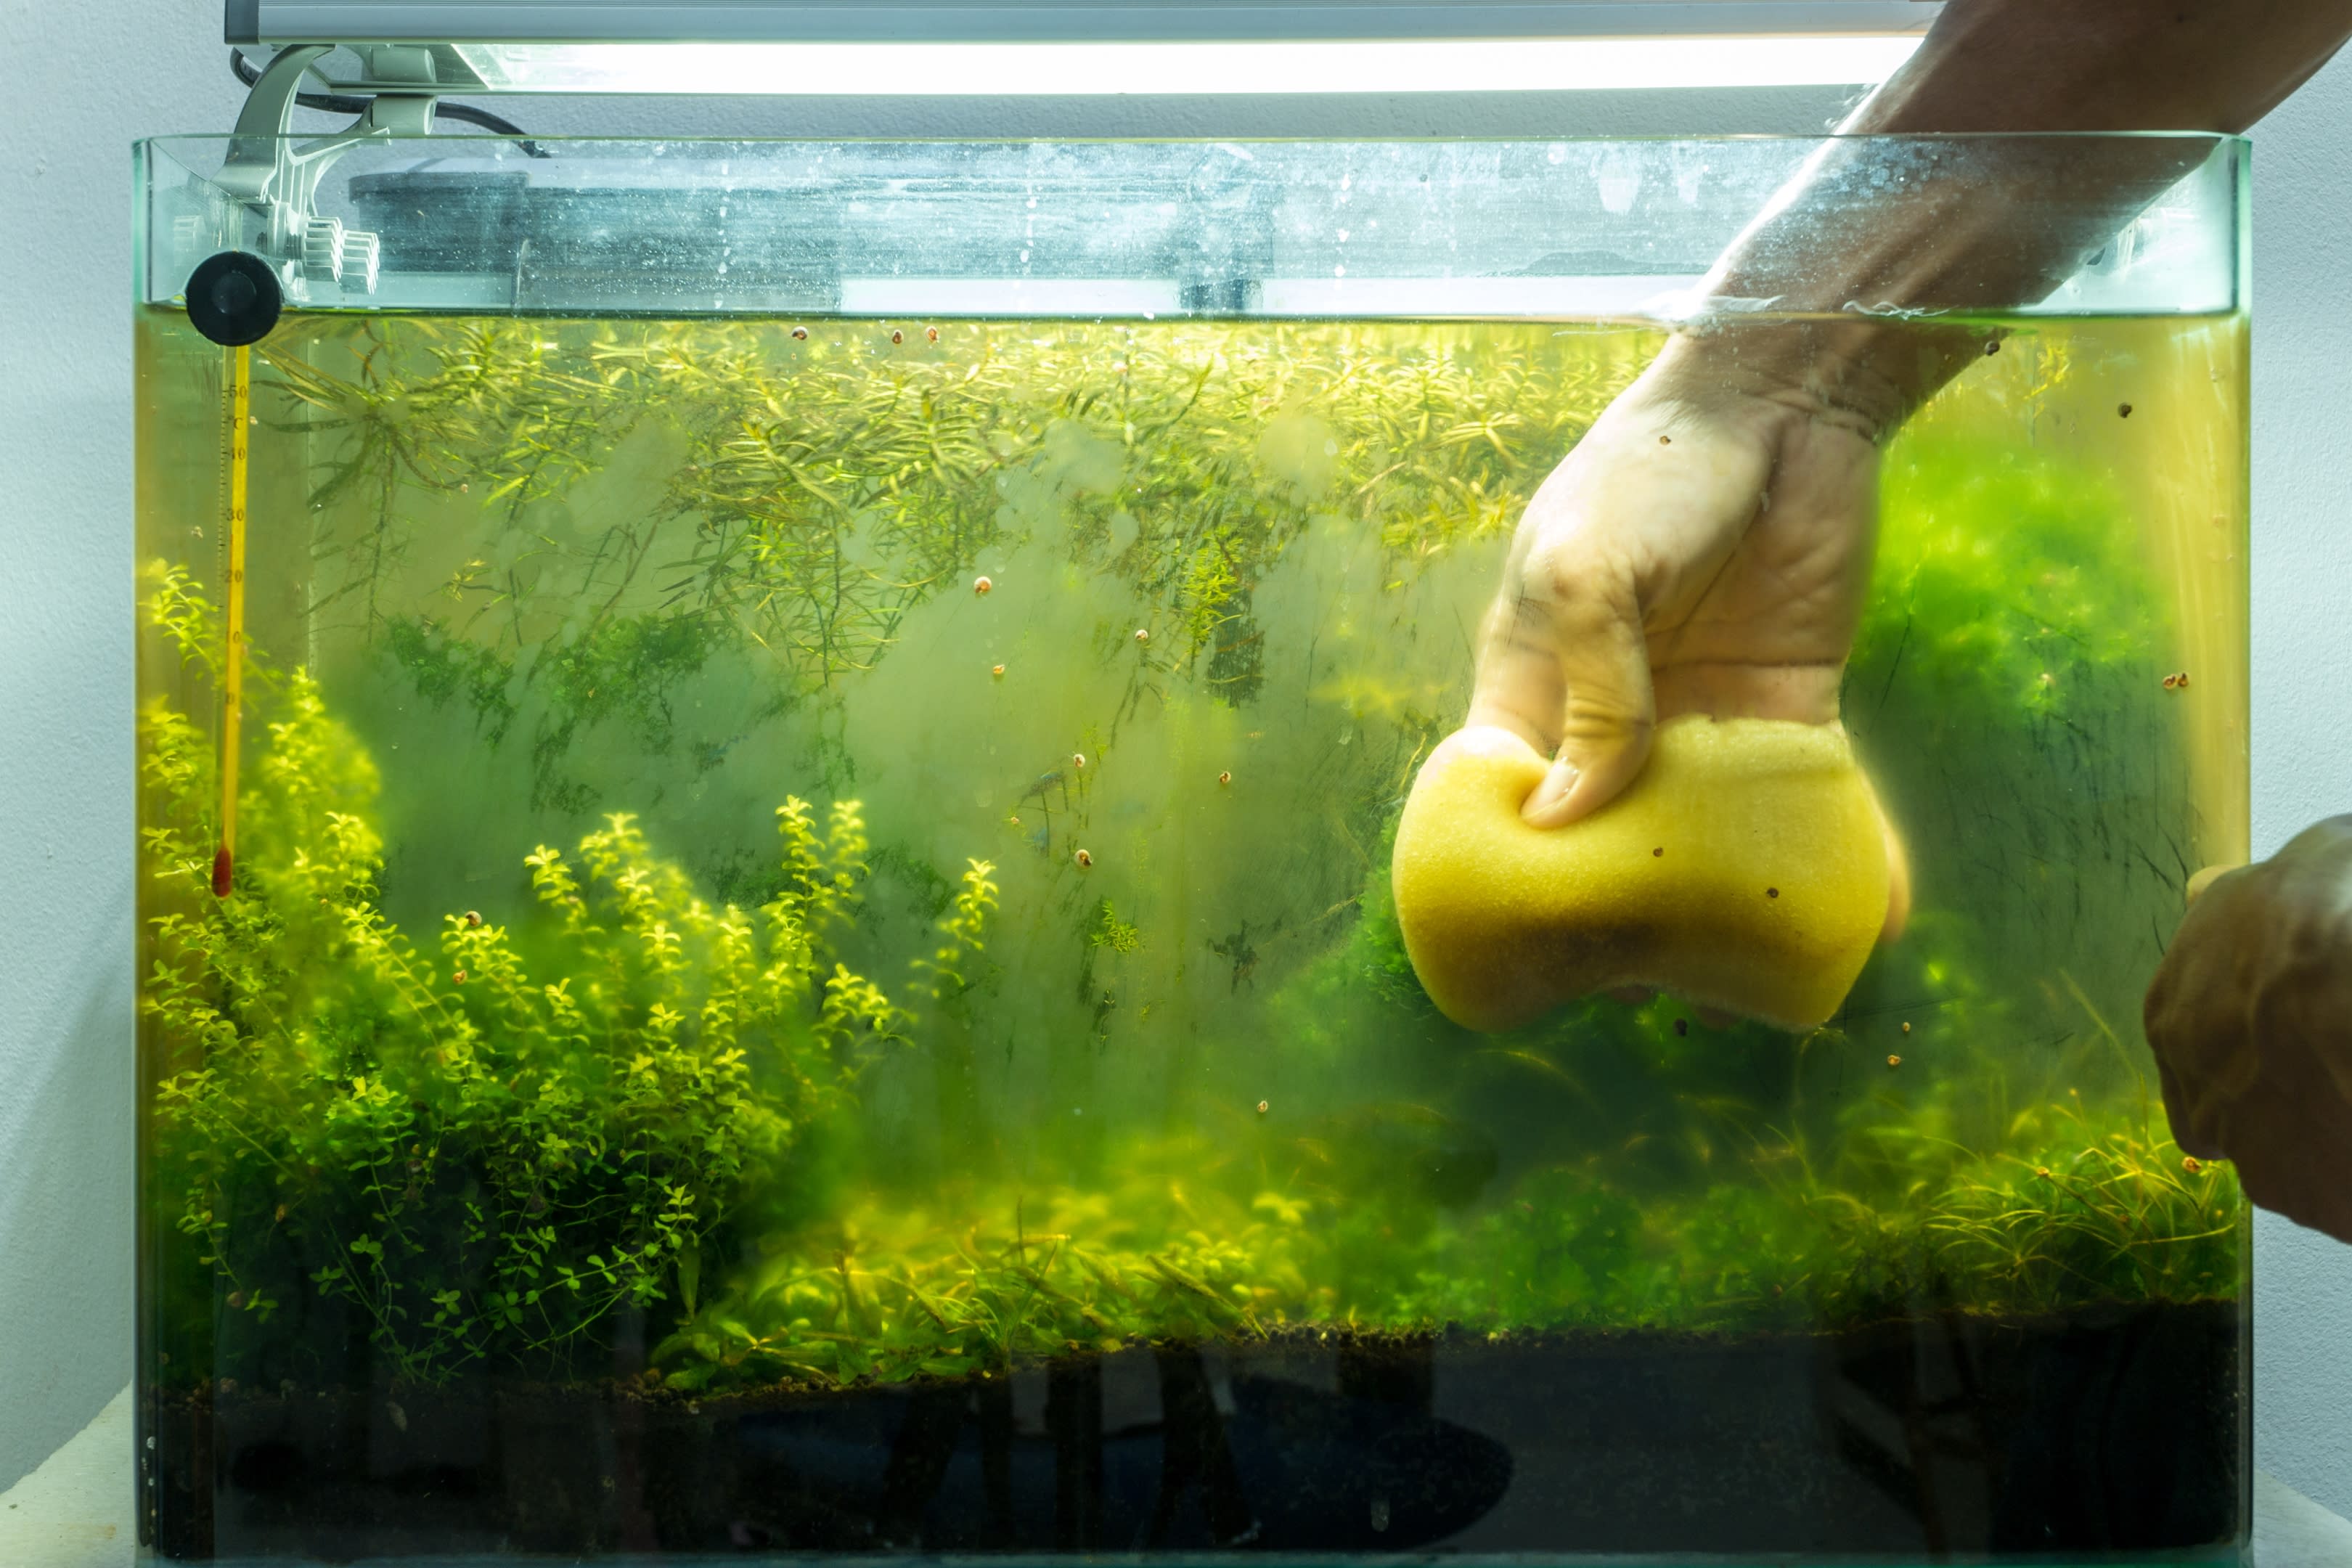
Image credit: Viva Aquarismo / Shutterstock
Used Fish Tank Cleaning vs Routine Aquarium Maintenance
Let’s clear up one common confusion first.
If your used fish tank is completely empty and you’re preparing it for a new aquarium, you can clean and disinfect the glass, decorations and equipment before starting again.
If the tank already contains healthy fish and an established biological filter, that’s a different job.
You don’t want to “deep clean” a healthy established tank in the same way you’d clean an empty second-hand aquarium. Beneficial bacteria live on filter media, substrate and other aquarium surfaces. Removing all of them at once can destabilize the biological system.
How to Change Betta Fish Water is a useful companion if you’re maintaining a running freshwater aquarium rather than restoring an empty one.
What You Need to Clean a Used Fish Tank
Before touching the aquarium, gather everything. This is one job where being organized saves a surprising amount of time.
- Dedicated aquarium bucket
- Algae scraper or aquarium-safe sponge
- Gravel vacuum or siphon
- Clean microfiber cloths
- Soft toothbrush for decorations and equipment
- Water conditioner for replacement water
- Gloves
- White vinegar for mineral deposits
- Appropriate disinfectant only when a full empty-tank sanitation is needed
- Fresh filter media if existing media is damaged or unsuitable
Keep aquarium buckets completely separate from household cleaning buckets. You do not want traces of detergent, floor cleaner or bleach finding their way into the fish tank.
The original Stories of Water article recommends a dedicated bucket, siphon, algae pad and filter media. That basic supply list still makes sense.
Step 1: Inspect the Used Aquarium Before Cleaning
Don’t start scrubbing immediately.
Inspect the tank first.
Look closely at the seams, corners, glass or acrylic panels, lid and base. Check for cracks, chips, damaged silicone, swelling, badly warped plastic and scratches.
A little dirt can be cleaned.
A cracked aquarium is a much bigger problem.
If the silicone has separated badly or the glass itself is damaged, think twice before putting hundreds of liters of water inside your living room.
If you’re dealing with a used tank that has been sitting empty for months or years, also check for old dead insects, residue, dust and mineral buildup around the waterline.
Step 2: Empty Everything From the Tank
For an empty used aquarium, remove everything.
Take out the gravel.
Remove rocks.
Remove decorations.
Take out driftwood and plants.
Disconnect the filter and heater.
You’ll have a much easier time cleaning a bare glass box than trying to maneuver a sponge around twelve plastic castles.
If you are working with an established aquarium containing fish, do not use this full-reset approach. In that situation, keep the fish in place and perform a normal maintenance routine.
Step 3: Remove Loose Dirt and Old Debris
Once the tank is empty, remove loose debris with paper towels or a clean cloth.
For dried algae and grime, use a dedicated aquarium sponge.
Do not use a household sponge that has been exposed to dish soap or cleaning chemicals.
That “tiny amount” of detergent you can’t see can still be a huge problem once the tank is refilled.
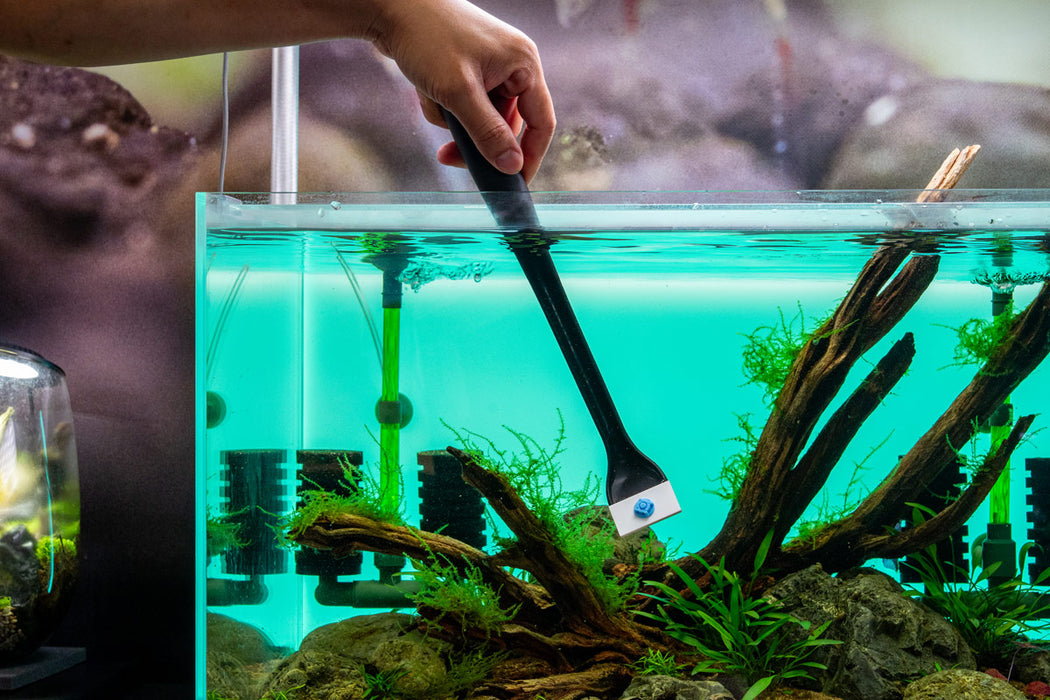
Image credit: Buce Plant / SL-Aqua
Step 4: Clean Aquarium Glass and Remove Algae
For normal algae buildup, a good aquarium algae scraper or pad will do the job.
Work slowly from top to bottom.
That way, loosened algae falls downward instead of immediately sticking to a section you’ve already cleaned.
If the aquarium is glass, a suitable scraper can help with stubborn deposits. For acrylic tanks, be much more careful because acrylic scratches more easily.
Never assume that a sharp metal blade is safe simply because someone online used one.
Use a tool designed for your tank material.
The latest Petco aquarium-cleaning guide also recommends choosing the cleaning tool according to whether the aquarium is glass or acrylic.
Step 5: Remove Hard-Water Stains With Vinegar
Mineral deposits are one of the most annoying parts of cleaning a used fish tank.
You scrub.
You scrub again.
You stare at the glass.
The white crust remains, seemingly proud of itself.
That’s where ordinary white vinegar can help.
For an empty tank, apply white vinegar to a cloth or affected area and allow it some time to loosen calcium and mineral deposits. Then wipe and rinse thoroughly.
Vinegar is useful for mineral scale. It should not be treated as a universal aquarium disinfectant.
That distinction is important when preparing a second-hand tank.
Step 6: Decide Whether the Tank Needs Disinfection
This is where the old article needs an important modern correction.
An empty used tank does not always need aggressive disinfection. If you know its history and it only has dust and mineral deposits, thorough cleaning and rinsing may be enough.
But if the tank previously held sick fish, you do not know its history, or you are concerned about pathogens, a proper empty-tank disinfection can be sensible.
Use only a suitable disinfectant according to the product’s instructions. Plain, unscented bleach is commonly used for aquarium disinfection, but it must be handled carefully, followed by thorough rinsing and appropriate dechlorination.
Never mix bleach with vinegar or other acids.
And never return fish to a tank simply because it “looks clean.” Any chemical used for sanitation must be completely removed before livestock goes in.
For an already established aquarium, do not routinely sterilize the tank. That would defeat the purpose of maintaining the biological environment.
Step 7: Clean the Gravel Properly
If you’re reusing old gravel, give it a serious rinse before putting it back.
Place the gravel in a clean bucket and rinse repeatedly until the water is much clearer.
Don’t use soap.
Don’t use household disinfectants.
Don’t dump the gravel into the bathtub and then wash it with bathroom cleaner.
Aquarium materials need aquarium-safe handling.
If the old gravel smells strongly foul or came from an unknown diseased aquarium, replacing it may be a better choice than trying to rescue it.
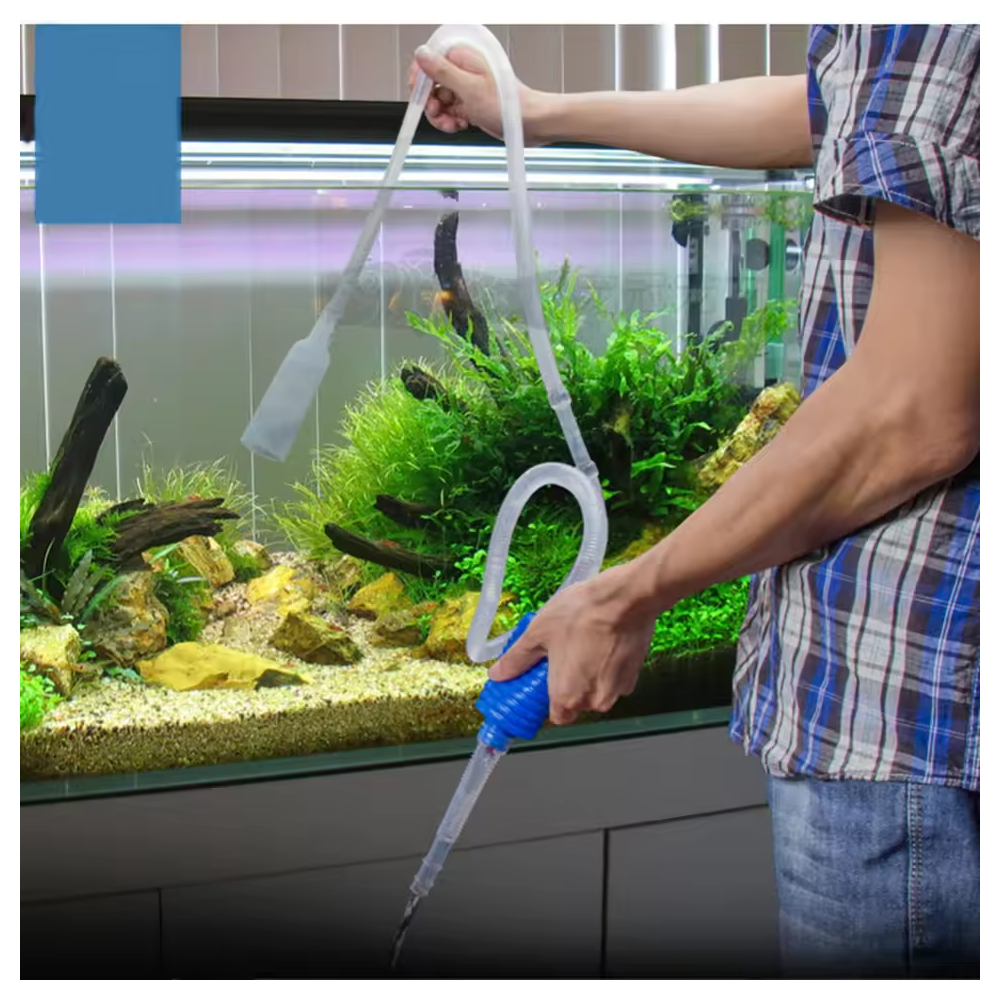
Image credit: Shopee Malaysia / aquarium siphon product image
Step 8: Vacuum the Substrate in a Running Aquarium
If you’re cleaning a used tank that is already running with fish, the gravel vacuum becomes your best friend.
A siphon removes old water while also lifting trapped waste from the substrate.
Insert the vacuum gently into the gravel and allow debris to rise while avoiding excessive disturbance.
You don’t need to turn the aquarium into a swimming pool mud wrestling event.
A moderate, controlled cleaning is usually better than aggressively digging through every inch of substrate every week.
Over-cleaning can disturb beneficial bacteria and upset the aquarium’s biological balance.
The aquarium plant-cleaning guide is also helpful if plant leaves or roots have collected debris.
Step 9: Clean the Decorations
Plastic decorations, ceramic ornaments and other non-porous items can often be cleaned with plain water and a dedicated brush or sponge.
For mineral deposits, vinegar can help on suitable surfaces.
For an empty aquarium requiring disinfection, follow a proper disinfecting procedure rather than improvising with random household products.
Never use scented cleaners.
Never use dish soap.
Never assume “rinse it really well” makes a household chemical aquarium-safe.
If the decoration is porous, fragile, painted or made from an unknown material, consider whether replacing it is safer than trying to rehabilitate it.
Step 10: Clean Aquarium Equipment Separately
Your filter, heater, tubing and accessories deserve attention too.
For an empty used aquarium, disassemble the equipment according to the manufacturer’s instructions.
Clean the housing and remove visible slime or mineral buildup.
Check the impeller in a motor-driven filter because debris around the impeller can reduce performance and create annoying noise.
Inspect suction cups, tubing and electrical cords for cracking or deterioration.
A used heater deserves special caution. If it has damaged insulation, cracks or signs of water intrusion, replacing it is usually wiser than taking chances.
The current Stories of Water aquarium heater guide can help when choosing a replacement heater for a freshwater tank.
Step 11: Clean the Filter Without Destroying Beneficial Bacteria
This is one of the biggest upgrades from the old way of thinking.
Do not treat your established filter like a dirty kitchen sponge.
Your biological media can contain the bacteria that process ammonia and nitrite.
For a running aquarium, rinse mechanical and biological filter media gently in water removed from the aquarium rather than chlorinated tap water. Current aquarium-care guidance from Aquarium Co-Op and Seachem recommends this approach specifically to reduce damage to beneficial bacteria.
The mechanical sponge can be squeezed and swished to remove accumulated debris.
Biological media should be handled more gently.
Don’t scrub it until it looks brand new.
Brand new is exactly what you don’t want it to be.

Image credit: Super zoo
The SunSun canister filter review can also help if you’re upgrading filtration or working with a larger aquarium.
Should You Replace the Entire Filter Cartridge?
Not automatically.
The original article recommended replacing the filter cartridge regularly, but cartridge replacement should be based on the media type, condition and manufacturer’s design—not an arbitrary “replace everything every month” rule.
If your cartridge contains useful biological media and you replace it all at once, you may remove a large portion of your established bacterial colony.
Mechanical media can often be rinsed when dirty and replaced when it is worn out.
Chemical media such as activated carbon has a different maintenance schedule and should be replaced according to how it is being used.
Seachem’s current freshwater guidance similarly separates mechanical, biological and chemical media rather than treating every filter component the same way.
For larger systems, the Stories of Water best canister filters guide provides additional background on external filtration.
Step 12: Clean the Aquarium Lid and Exterior
People often spend thirty minutes staring into the tank and forget the outside of the glass.
Don’t.
Wipe the exterior glass with a clean microfiber cloth.
Clean the lid.
Remove mineral deposits around the top rim.
Wipe dust from the light fixture.
For outside-only mineral stains, a cloth lightly dampened with white vinegar can help, but keep cleaners away from aquarium water and electrical components.
If the tank sits near a window, regular exterior cleaning also makes a surprising difference to how bright the aquarium looks.
Step 13: Rinse Everything Extremely Well
This is where patience pays.
Once you’ve used vinegar, a disinfectant, or any other treatment, rinse repeatedly with clean water.
You should not be relying on your nose alone, but a lingering chemical odor is certainly a reason to keep rinsing.
For disinfected equipment, follow the full neutralization and rinsing procedure associated with the product or disinfectant you used.
Never take shortcuts here.
A clean-looking aquarium with chemical residue is not a clean aquarium.
Step 14: Refill the Tank With Conditioned Water
For a running freshwater aquarium, replacement water should be treated appropriately to remove chlorine or chloramine and brought close to the tank’s temperature.
Modern aquarium guidance recommends temperature-matching replacement water to minimize unnecessary stress on fish. Petco and PetMD both emphasize conditioned, temperature-appropriate replacement water as part of routine maintenance.
Don’t simply turn the tap on full blast and create an indoor wave pool.
Pour slowly.
Or use a hose designed for aquarium water changes.
The Stories of Water betta water-change guide is useful for understanding the basic process.

Image credit: Aquasabi
How Much Water Should You Change?
There is no single percentage that works for every aquarium.
Stocking level, feeding, filtration, plants, water quality and nitrate accumulation all influence the right maintenance schedule.
For many healthy freshwater aquariums, a routine partial water change around 10–25% weekly or a somewhat larger change less frequently can be appropriate, depending on the tank.
PetMD’s 2026 guidance gives 10% weekly or 25% every two weeks as common starting points and says not to replace more than 50% at once during routine cleaning.
Don’t blindly follow a calendar if your test results tell you something different.
Test the water.
Observe the fish.
Adjust the maintenance routine.
Should You Add Aquarium Salt After Cleaning?
This is another place where older aquarium advice can cause confusion.
Do not add aquarium salt automatically after every water change.
Freshwater fish do not all need salt, and routine salt dosing can be inappropriate for some species and plants.
Salt may have specific uses in certain situations and for certain species, but it should be used intentionally rather than as a universal “clean tank” ingredient.
So, unlike the old article’s general recommendation, salt should not be part of your default fish-tank cleaning routine.
Focus first on clean equipment, conditioned water, stable temperature, good filtration and appropriate water parameters.
What If the Used Aquarium Is Extremely Dirty?
Sometimes you don’t have a “used fish tank.”
You have a biological archaeology project.
If the glass is heavily coated, the decorations are filthy and the tank smells foul, take your time.
Do not try to solve everything in five minutes.
Work in stages:
- Remove old debris.
- Clean the glass.
- Soak removable hardscape if appropriate.
- Clean equipment.
- Rinse thoroughly.
- Disinfect only if there is a reason.
- Rinse again.
- Allow the tank to dry if performing a full empty-tank reset.
A thorough process is much safer than dumping every cleaning chemical you own into one bucket and hoping for the best.
What If the Tank Has a Bad Smell?
A strong odor usually means there is organic material somewhere.
Check:
- Filter media
- Old gravel
- Hidden decorations
- Rotting plant matter
- Dead insects or animals
- Old food trapped under substrate
For an empty used tank, clean all removable components and rinse thoroughly.
For a running tank, investigate the source rather than simply adding a fragrance or “water clarifier.”
The brown algae guide can also help when the problem is more about persistent algae and discoloration than simple dirt.
How to Deal With Cloudy Water After Cleaning
Some temporary cloudiness can happen after substrate disturbance or cleaning.
But persistent cloudy water deserves investigation.
Possible causes include:
- Disturbed substrate
- Bacterial bloom
- Excess food or organic waste
- Over-cleaning of the biological filter
- New-tank cycling issues
- Excess algae
Don’t rush to add a chemical clarifier simply because the water isn’t perfectly clear.
Find the cause.
The image below shows just how dramatic cloudy-water problems can look before the underlying issue is addressed.
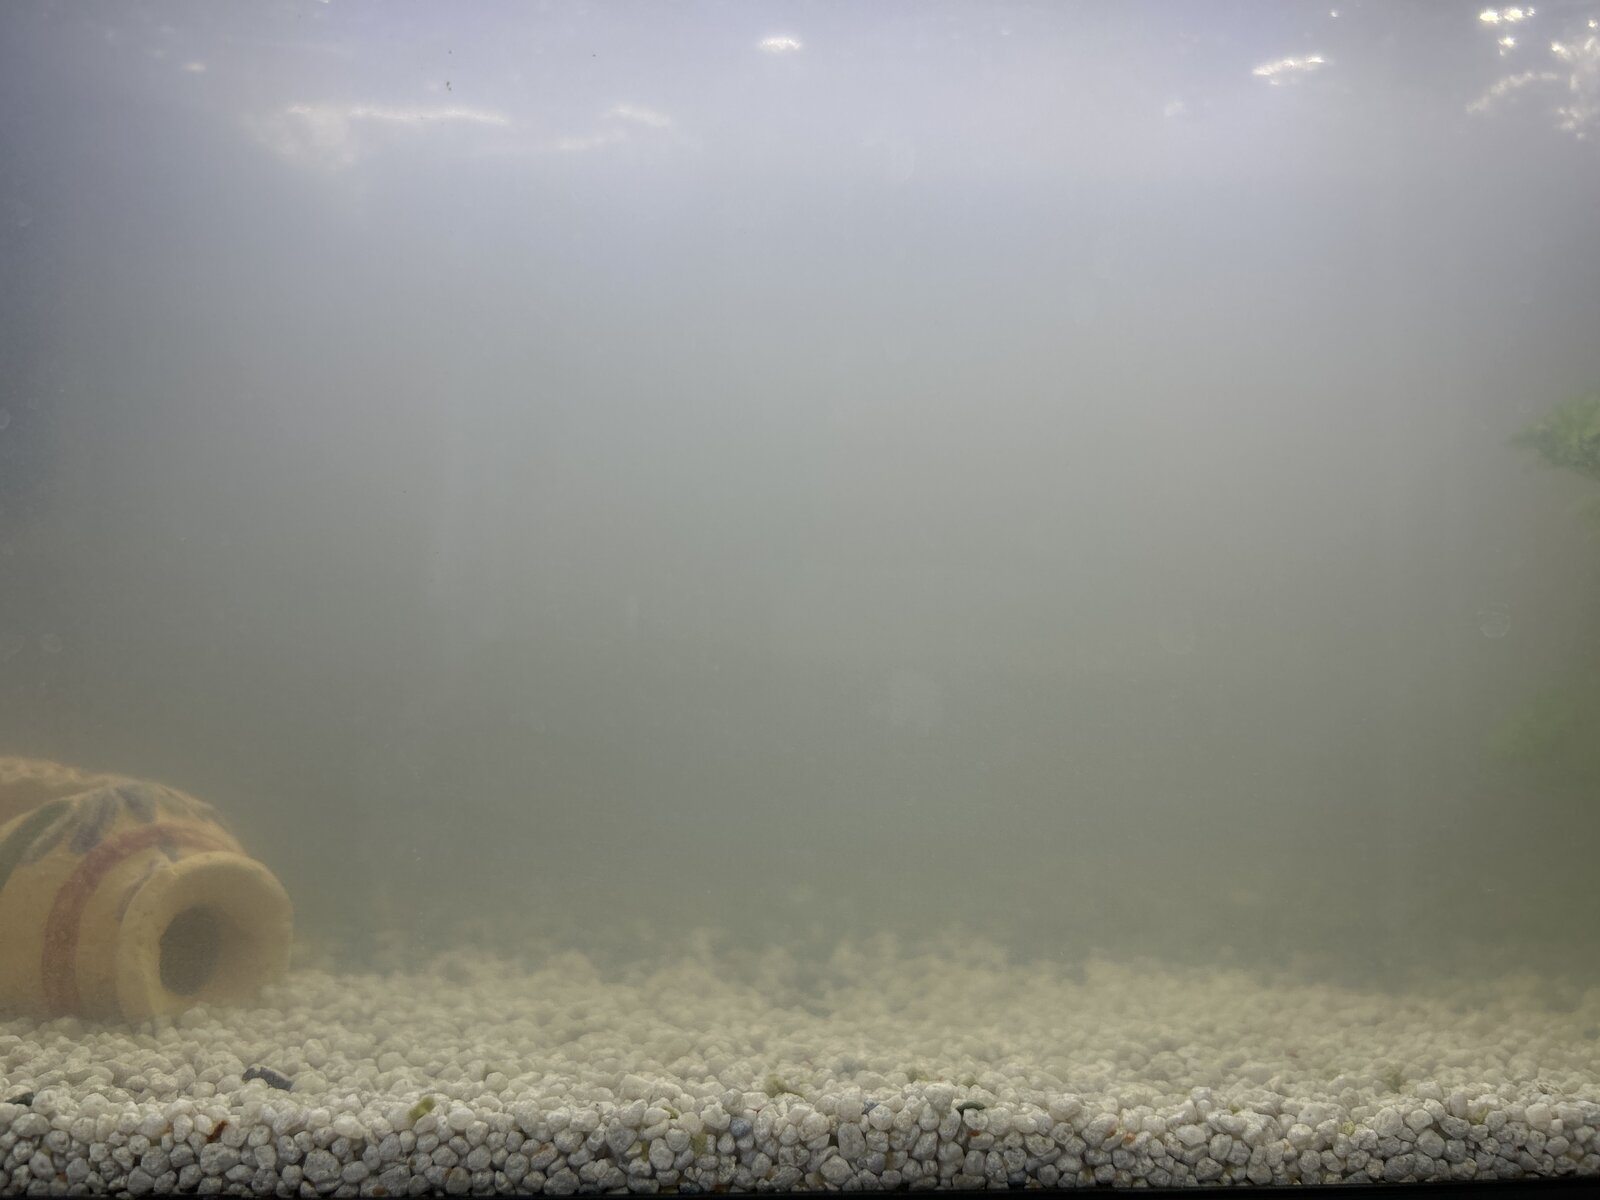
Image credit: PortalPez aquarium forum
The Stories of Water fish finder guide obviously won’t solve cloudy aquarium water, but it is a useful example of another important fishkeeping lesson: equipment helps, but understanding the underlying system matters more.
Can You Clean a Used Fish Tank With Dish Soap?
No.
Don’t do it.
Dish soap is designed to remove grease and residues from household surfaces, not to prepare an aquarium for aquatic life.
Even tiny amounts left behind can be harmful.
The same warning applies to general-purpose cleaners, disinfectant sprays, scented products and other household chemicals unless they are specifically appropriate for aquarium use and the tank is empty.
Plain water, appropriate aquarium tools and carefully chosen cleaning methods are much safer.
Can You Clean a Used Fish Tank With Vinegar?
Yes, for suitable cleaning tasks such as mineral deposits and hard-water stains.
But vinegar is not a replacement for proper disinfection when disinfection is actually necessary.
Think of vinegar as a mineral-scale cleaner, not a magical aquarium sterilizer.
That’s an important distinction when preparing a second-hand aquarium.
Can You Use Bleach to Clean a Used Aquarium?
For an empty aquarium, plain unscented bleach can be used as a disinfectant when proper dilution, contact time, ventilation, neutralization and rinsing procedures are followed.
But bleach is not a routine maintenance product for an established aquarium.
It should never be introduced into a tank containing fish.
Never mix bleach with vinegar, acids or other cleaners.
And when in doubt, choose a commercial aquarium-disinfection protocol and follow the manufacturer’s directions exactly.
What About Cleaning a Used Saltwater Aquarium?
The basic cleaning principles are similar, but saltwater tanks have a few extra considerations.
Salt creep can form around the rim, equipment and plumbing.
Hard-water or evaporated-salt deposits may be stubborn.
And replacement water requires correct salinity, not just temperature matching.
For ongoing marine maintenance, the Stories of Water reef salt guide is a useful companion.
For a newly purchased empty marine tank, clean and inspect it before mixing saltwater and starting the biological cycle. The best saltwater test kit guide can help with the testing side once the system is running.
Should You Clean Aquarium Plants?
Yes, but gently.
For a running aquarium, remove algae manually rather than scrubbing delicate leaves aggressively.
For a completely empty used aquarium, inspect every plant before reusing it. Look for algae, snails, eggs and any signs of disease or pest problems.
The updated aquarium plant guide has more information on handling and establishing aquatic plants.
If you are dealing with plastic decorations or artificial plants, a dedicated toothbrush can make quick work of accumulated slime.
How to Clean a Used Fish Tank Filter
The answer depends on whether the filter is being restarted on an empty aquarium or maintained on an established one.
Empty tank: clean the housing, tubing, impeller and media as appropriate, replace worn components and disinfect if necessary.
Established tank: preserve the biological media and rinse it in old aquarium water rather than chlorinated tap water.
For filter troubleshooting, the Stories of Water SunSun canister filter review is another useful resource.
How Often Should You Clean a Fish Tank?
Don’t think of aquarium maintenance as one giant cleaning day every few months.
Think of it as small routine jobs.
A simple schedule can look like this:
Daily
- Check fish behavior.
- Check temperature.
- Make sure equipment is operating normally.
- Remove obvious uneaten food.
Weekly or As Needed
- Inspect the glass for algae.
- Perform an appropriate partial water change.
- Vacuum part of the substrate.
- Check the filter flow.
Monthly or Periodically
- Inspect filter tubing and impeller.
- Clean removable equipment.
- Inspect heaters, cords and suction cups.
- Trim plants when needed.
Actual frequency depends on tank size, livestock, feeding and filtration.
The aquarium air-pump guide can also help when evaluating whether your aeration equipment needs an upgrade.
How to Make Aquarium Cleaning Much Easier
The secret isn’t a miracle cleaner.
It is consistency.
Clean algae before it becomes a thick carpet.
Vacuum waste before the substrate becomes disgusting.
Clean filter media before flow drops dramatically.
Test water before the fish start looking unhappy.
That small-and-often strategy is much easier than waiting until your aquarium resembles a swamp and then declaring war on it.
Aquarium Cleaning Mistakes You Should Avoid
- Using soap or household cleaners: even residue can be dangerous.
- Cleaning every filter component at once: this can damage beneficial bacteria.
- Replacing all biological media at once: stagger replacements when possible.
- Making huge routine water changes: sudden chemistry changes can stress fish.
- Using a metal scraper on acrylic: scratches can permanently damage the tank.
- Adding salt automatically: freshwater tanks do not all need salt.
- Chasing crystal-clear water instead of fixing the cause: cloudiness is a symptom, not always the problem itself.
The Best Method for a Completely Empty Used Tank
If your second-hand aquarium is empty, this is the order I’d use:
- Inspect the tank and seams.
- Remove all old equipment and decorations.
- Dry-remove loose debris.
- Clean the glass and mineral deposits.
- Rinse gravel separately.
- Clean decorations and equipment.
- Disinfect only when appropriate.
- Rinse everything extremely well.
- Allow the tank and disinfected equipment to dry where appropriate.
- Reassemble the aquarium.
- Add fresh substrate, decorations and equipment.
- Fill with conditioned water.
- Start the filter and heater.
- Cycle the aquarium before adding fish.
That final point is crucial.
A spotless aquarium is not automatically a biologically ready aquarium.
If you’re starting from scratch, read the Stories of Water aquarium cycling guide for the biological side of getting a new tank ready.
What Should You Do Before Adding Fish to a Clean Used Tank?
Don’t celebrate by immediately buying twelve fish.
First make sure:
- The equipment works.
- The heater is stable.
- The filter is running properly.
- The water has been conditioned.
- The aquarium has completed an appropriate nitrogen cycle.
- Ammonia and nitrite are at safe levels.
A clean tank is step one.
A stable ecosystem is step two.
Healthy fish come after that.
Final Thoughts: How to Clean a Used Fish Tank the Right Way
Cleaning a used fish tank is really about knowing what needs to be removed and what needs to be preserved.
For an empty second-hand aquarium, you can be thorough. Remove grime, scrub algae, dissolve mineral deposits, inspect every component and disinfect when there is a good reason to do so.
For an established aquarium with fish, the approach is completely different. Avoid unnecessary sterilization. Perform partial water changes. Vacuum the substrate carefully. Clean algae from the glass. Maintain the filter without destroying its beneficial bacteria.
The biggest change from the old-school approach is simple: cleaner does not always mean healthier.
Your aquarium does not need to look like a laboratory.
It needs stable water, functioning filtration, appropriate temperature, sensible stocking and regular maintenance.
Use a dedicated bucket.
Skip the soap.
Don’t scrub established biological media under chlorinated tap water.
Match replacement water temperature.
And don’t add aquarium salt simply because the tank was cleaned.
Once you understand those basics, even a grimy second-hand aquarium can get a fresh start.
That dusty old tank can become a bright planted aquarium.
That cloudy glass can become crystal clear.
And that neglected filter can once again quietly do its job in the background.
In other words, your used fish tank doesn’t need a miracle.
It just needs the right cleaning routine.
And preferably, fewer mystery substances than were found in the previous owner’s garage.